

Viral recipes can be a bit of a gamble, can’t they? One minute you are staring at a ludicrously gooey dessert wrap thinking, “Yep, I need that in my life,” and the next you have spent 15 minutes trying to persuade a slice of bread to become a stick.
That is why I’m quite happy to be the food crash test dummy. This batch included a homemade Dorito Snickers-style chocolate bar, frozen watermelon Fab lollies, air fryer garlic Parmesan breadsticks, a s’mores wrap and mozzarella sticks cooked directly over a fire. Some were brilliantly simple. Some needed a few important tweaks. And one of them was so good that it absolutely deserves a regular place in the kitchen.
Here is the honest rundown, including what worked, what went slightly sideways, and the tips that make these internet-famous recipes much more likely to succeed at home.
Table of Contents
- The Viral Recipe Scorecard
- Dorito Snickers: A Chocolate Bar That Should Not Work, But Does
- Frozen Watermelon Fab Lollies: The Moisture Problem You Must Solve
- Air Fryer Garlic Parmesan Breadsticks: The Recipe That Won the Day
- The Nutella S’mores Wrap: A Dessert Pizza Folded Into a Parcel
- Can You Cook Mozzarella Sticks Over a Fire?
- What These Viral Recipes Taught Me
- More Ideas for a Fruit-Filled Kitchen
- Final Ranking: Which Viral Recipes Should You Make?
- Frequently Asked Questions
The Viral Recipe Scorecard
- Dorito Snickers chocolate bar: Weirdly good, with a sweet, salty, spicy crunch.
- Watermelon Fab lolly: Delicious and refreshing once the watermelon is dried properly.
- Air fryer garlic Parmesan breadsticks: The winner. Crispy, buttery, fluffy and genuinely phenomenal.
- S’mores wrap: Extremely indulgent, slightly messy and absolutely what it promises to be.
- Fire-roasted mozzarella sticks: Surprisingly smoky and tasty, but much more of an outdoor novelty.
Dorito Snickers: A Chocolate Bar That Should Not Work, But Does
The first creation was not a recipe I had been sent. This was my own slightly questionable invention, inspired by a previous chocolate slab made with crisps. The original Pringles version had divided opinion because it was very salty. Personally, I loved the sweet and salty contrast, but it was time to turn things up a little.
The plan was simple enough: make a chunky milk chocolate bar with crushed chilli Heatwave Doritos, roasted peanuts and smooth peanut butter. It is called a Dorito Snickers because it has peanuts, peanut butter and chocolate, rather than because it tastes exactly like a Snickers. That distinction may prove important for entirely legal reasons.
What you need
- A bag of chilli-flavoured Doritos or another bold, spicy tortilla chip
- Roasted chopped peanuts
- Smooth peanut butter
- Melted milk chocolate
- A silicone chocolate mould, loaf tin or lined dish
How to make the Dorito chocolate slab
- Crush the Doritos inside the bag. You want a mixture of crumbs and little chunks, not dust.
- Add the roasted peanuts directly into the bag with the crushed crisps.
- Add enough smooth peanut butter to bind the mixture together, then squeeze and massage the bag until it is combined.
- Melt the chocolate and pour it into the bag. Use enough chocolate to coat and surround every crunchy bit.
- Tip the mixture into a mould or lined tray, then tap it firmly on the counter to settle it and remove gaps.
- Chill until fully set, then slice or break into bars.
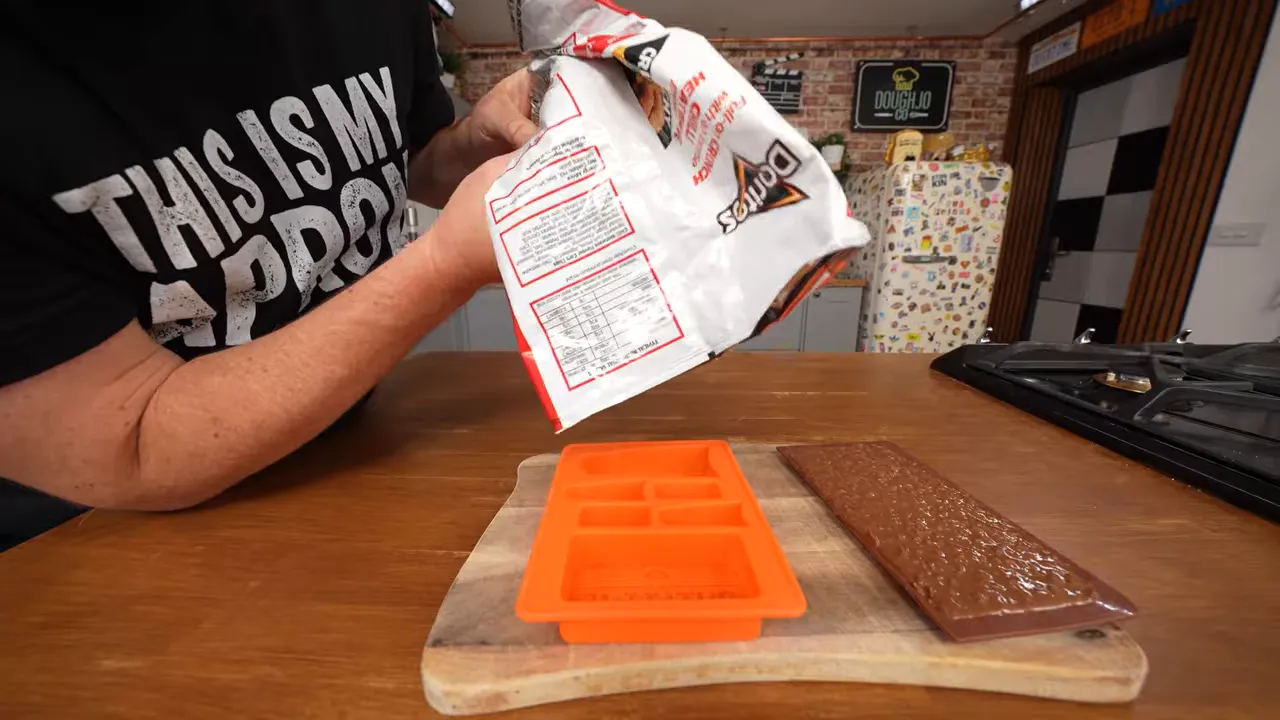
There is something quite enjoyable about the fact that the bag itself becomes the mixing bowl. It keeps the mess down, which is handy when you are working with peanut butter, shards of crisps and a frankly unnecessary amount of melted chocolate.
The crucial thing is texture. Smooth peanut butter is doing the binding, while separate roasted peanuts provide the bigger bite. If you use crunchy peanut butter alone, it will still taste good, but you lose that more deliberate contrast between creamy peanut butter and crunchy nuts.
Once set, this was actually a winner. The peanut butter came across as the sweetest part, the chocolate rounded it all out, and then the chilli heat arrived afterwards. It did not taste like a conventional chocolate bar, but it had the same madcap appeal as one of those chocolate bars packed with unexpected bits and pieces.
Verdict: Much better than it has any right to be. If you enjoy chilli chocolate, salted snacks and peanut butter, give it a go. It is even better than the Pringles version.
Frozen Watermelon Fab Lollies: The Moisture Problem You Must Solve
A proper Fab lolly is a bit of retro British ice cream brilliance: fruity, creamy, chocolatey and covered in colourful vermicelli sprinkles. This viral version replaces most of that with a thick wedge of watermelon, Greek yogurt, chocolate and sprinkles.
That makes it sound refreshingly sensible, although it is still watermelon covered in yogurt and chocolate, so perhaps we should not get carried away with the health halo.
What you need
- Watermelon, cut into thick rectangular wedges
- Lolly sticks
- Greek yogurt
- Melted milk or dark chocolate
- Vermicelli sprinkles, rather than hundreds and thousands
How to make watermelon Fab lollies
- Cut thick rectangles of watermelon and trim away enough rind to create the red lolly shape.
- Push a lolly stick into the base of each wedge.
- Pat the watermelon very dry with kitchen towel.
- Coat roughly two-thirds of each wedge in Greek yogurt, keeping the red watermelon visible.
- Freeze until the yogurt is firm and properly attached.
- Dip the bottom portion into melted chocolate, leaving the white yogurt layer visible.
- Add vermicelli sprinkles before the chocolate sets, then return the lollies to the freezer.
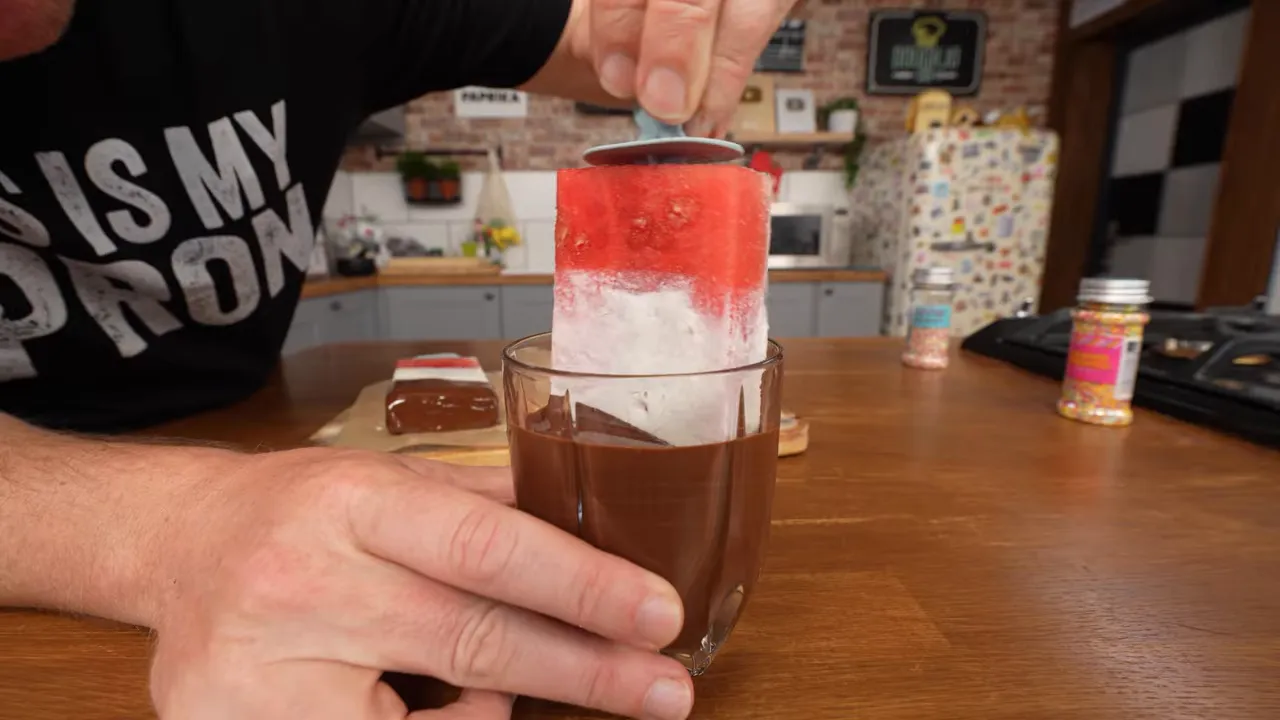
The important discovery here was that watermelon is incredibly wet. Obviously. That is rather the point of watermelon. But if you try to coat a moist piece of fruit in yogurt, the coating can slip, streak or peel clean away later like a very unfortunate chocolate hat.
Patting the watermelon dry made a huge difference. The better-dried wedge took the yogurt coating far more successfully, and it was much easier to cover with chocolate later. Two yogurt dips also helped build a more substantial layer where the first coating looked a little thin.
Freezing between stages matters too. The yogurt needs to lock onto the fruit before the chocolate goes anywhere near it. The cold surface then helps the chocolate set quickly, which is useful when you are trying to get sprinkles on before they roll around the kitchen like tiny colourful hazards.
The finished result was absolutely delicious. Frozen watermelon has a lovely texture, the Greek yogurt adds creaminess, and the chocolate creates a proper treat rather than simply fruit on a stick. If plain yogurt is not normally your thing, the combination of fruit, chocolate and sprinkles changes the whole experience.
Verdict: Make it, but dry the watermelon first. Do not skip that bit. One properly made lolly is much more satisfying than a badly coated batch.
Air Fryer Garlic Parmesan Breadsticks: The Recipe That Won the Day
These were the clear favourites. The viral idea was to remove the crusts from bread, roll the slices into sticks, coat them in garlic butter and Parmesan, then air fry them until golden and crisp.
On paper it is a very clever way to turn ordinary bread into something that feels like a cross between garlic bread, a breadstick and a tiny warm baguette. In practice, there is one annoying stage: rolling the bread tightly enough that it stays rolled.
Ingredients
- Soft sliced bread, ideally not too thick
- Melted butter
- Garlic powder
- Fresh chopped parsley or dried herbs
- Finely grated Parmesan
- A little water for sealing the seam
The best method for rolling the bread
Start by cutting the crusts from the bread. Then flatten every slice with a rolling pin. Do not merely squash it down with your hands and hope for the best. A rolling pin compresses the bread evenly, makes it smoother and gives you a much better chance of forming a tidy stick.
Roll the flattened slice tightly from one end to the other. The seam can be a little stubborn, so lightly wet the final edge with water before pressing it down. It is not glamorous, but it helps the bread bond to itself.
This is the fiddly bit. Thick bread is harder to roll and more likely to split, so thinner slices may be easier if you are making lots. It took far longer than expected to make only a few, which is worth knowing before attempting a mountain of nine breadsticks.
Garlic butter and Parmesan coating
Melt the butter and mix in garlic powder and chopped parsley. Grate Parmesan onto a plate to create a generous cheese bed. Dip each rolled breadstick in the garlic butter, then roll it through the Parmesan.
Using one hand for the wet butter stage and one hand for the dry cheese stage is a little breading trick that saves you from turning into a human Parmesan sculpture. The butter also helps the breadsticks puff slightly and encourages the seam to hold together.
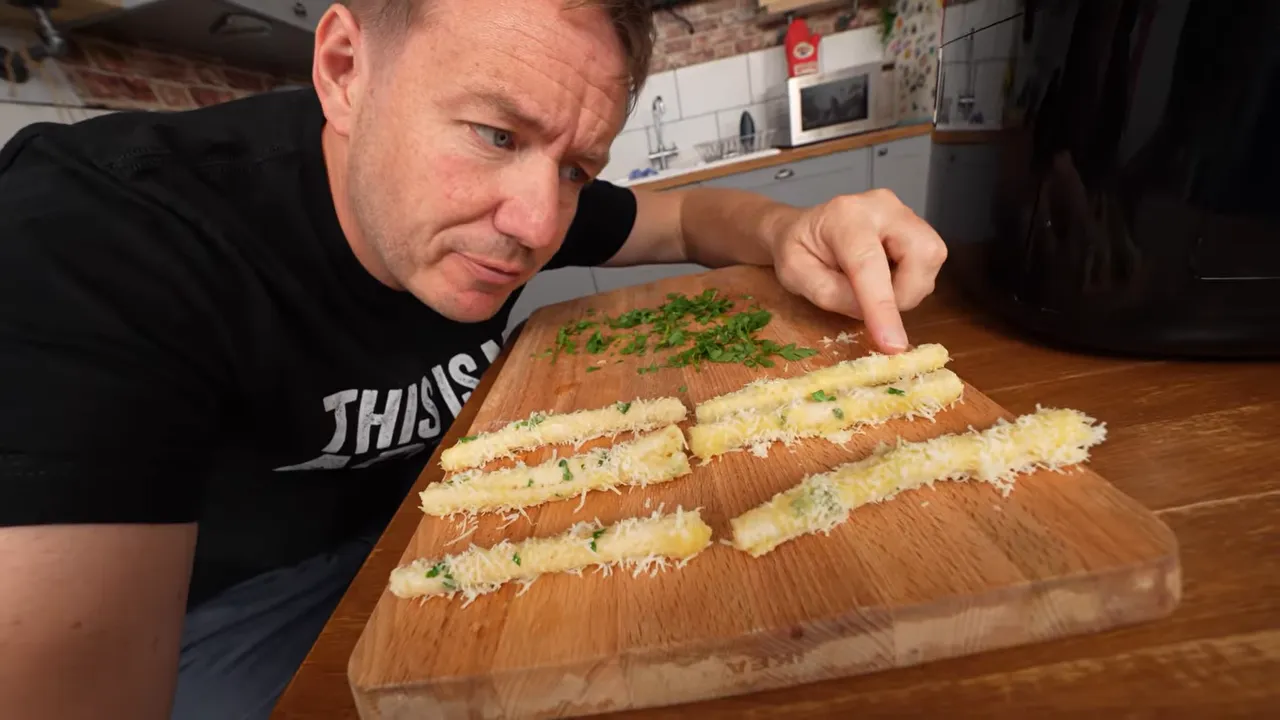
Air frying the breadsticks
Arrange the breadsticks in the air fryer basket with enough room for the hot air to move around them. Cook at 180°C for about seven minutes, checking partway through. A little shake or repositioning can help them crisp evenly.
The breadsticks did split slightly in places, but it genuinely did not matter once they were cooked. They came out with a golden, crunchy exterior, a buttery garlic edge and a soft, fluffy centre. The Parmesan gave them a lovely savoury crust without making them heavy.
A little extra garlic butter and parsley on the side made a brilliant dip and revived the flavour even more. It was the sort of recipe where you hear that little delicate crunch and instantly know it has worked.
Verdict: Absolutely phenomenal. This is the one to make first. The rolling stage is a faff, but the result is worth it.
|
The Nutella S’mores Wrap: A Dessert Pizza Folded Into a Parcel
This one came via Hugo, and I can see why. It is a tortilla divided into four sections, each packed with a different s’mores-style filling, folded into a parcel and toasted in a pan.
It is not pretending to be restrained. Nutella, marshmallow fluff, mini marshmallows and crushed graham crackers all make an appearance. There was a comment suggesting a person might want 50 of them. I would suggest having one first, then perhaps going for a very long run.
How to assemble the viral s’mores wrap
- Lay out a large tortilla and cut one slit from the centre straight to the edge.
- Divide the tortilla into four imaginary quarters.
- Spread Nutella in one quarter.
- Add marshmallow fluff in another.
- Add mini marshmallows in a third section.
- Add crushed graham crackers in the final section.
- Fold each quarter over the next, continuing around until you have a layered triangle parcel.
- Toast it gently in a frying pan until crisp and golden on both sides.
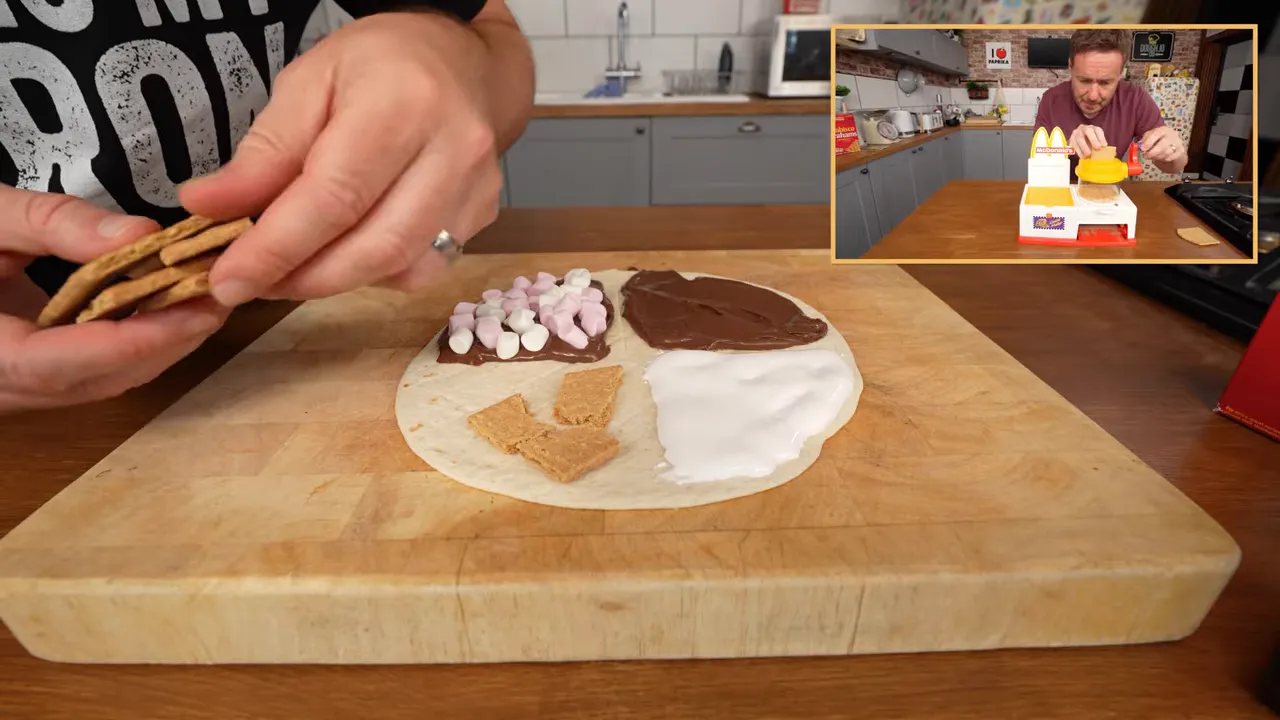
The big thing here is gentle heat. The sugar in Nutella and marshmallows can scorch quickly, so do not blast it over a fierce flame. The tortilla should turn golden while the filling warms and becomes gooey.
There may be a bit of escaping marshmallow. There may be a charred Nutella patch. There may be a moment where you question whether you will ever regain your fingerprints after touching hot sugar. But once it is cooked, the flavours really work together.
The toasted tortilla gives the wrap a crisp edge, the crackers add a little crunch, and the marshmallow provides the gooey s’mores element. A second bite was immediately taken, which is generally a very positive sign.
Verdict: A definite ten out of ten for full-on dessert energy. Make one to share, because it is rich.
Can You Cook Mozzarella Sticks Over a Fire?
The answer is yes. The more useful question is whether you should bother. This viral idea involved threading mozzarella sticks onto a skewer and holding them above an open flame until crisp, charred and hot inside.
It looks slightly ridiculous, particularly if you are using a massive stainless-steel skewer for two tiny mozzarella sticks. But wooden skewers near open flames did not seem like a sensible route, so stainless steel was the safer option.
These were jalapeño mozzarella sticks, which accounted for their slightly green appearance. They were cooked over the naked flame while being constantly rotated, with the aim of getting a smoky exterior without leaving the centre frozen.
What worked
- The open flame gave the coating real char and a smoky flavour.
- The cheese did warm through rather than staying cold in the middle.
- The outside became crisp enough to give a decent bite.
What to be careful with
- Use a secure metal skewer and heatproof gloves or tongs where appropriate.
- Keep rotating so one side does not burn while the centre stays cold.
- Check the cooking instructions on the packet and make sure the filling is heated through.
- Do not stand too close to the fire, especially when cheese starts escaping.
The result was actually pretty good. The smoky char added something you would not get from an oven or air fryer, and the cheesy centre was warm. But it is definitely more of a garden fire pit experiment than a replacement for cooking them normally.
Verdict: Fun and surprisingly tasty, but best saved for an outdoor cooking moment rather than a Tuesday evening snack emergency.
What These Viral Recipes Taught Me
The best viral recipes tend to have one clear advantage: they make a familiar ingredient behave in a new way. Bread becomes a crispy garlic Parmesan stick. Watermelon becomes an ice lolly. A tortilla becomes a portable s’mores dessert.
The less successful ones usually hide the difficult bit. A 15-second clip might make it look as though bread naturally rolls itself into a perfect cylinder, but the joining stage can take ages. A piece of fruit can look beautifully coated in seconds, but moisture changes everything.
So before committing, ask a few basic questions:
- Does the recipe rely on a hidden prep step? Drying, chilling, flattening and sealing often matter more than the flashy bit.
- Can it be made with normal equipment? The air fryer breadsticks were excellent because most kitchens can manage them.
- Is the effort justified by the result? A good recipe needs to taste good enough to make you do it again.
- Is it safe? Open flames, hot sugar and molten cheese deserve a healthy amount of respect.
The breadsticks passed every test except speed. They took a little patience to roll, but they were absolutely worth the effort. The watermelon Fab lollies were also a strong contender, particularly in warm weather, as long as you remember to dry the fruit before coating it.
More Ideas for a Fruit-Filled Kitchen
If the watermelon lollies have put you in the mood to do more with fresh produce, have a look at Recipes to Make From Your Herb Garden for everyday meal ideas built around windowsill herbs. It is a lovely reminder that a small amount of fresh basil, parsley, mint or chives can transform very simple food.
For more kitchen experiments from this particular chaotic corner of the internet, there is also the full viral recipe testing write-up, plus the growing Barry Tries playlist.
The air fryer used for the breadsticks was a Bosch model. If you are after the same style of machine, the air fryer mentioned here is available through the affiliate link. It is especially handy for recipes where you want proper crunch without heating up the entire kitchen.
Final Ranking: Which Viral Recipes Should You Make?
- Air fryer garlic Parmesan breadsticks: The easy winner. Crisp outside, soft inside, buttery, garlicky and properly satisfying.
- Watermelon Fab lollies: Refreshing, fun and genuinely delicious. Dry the watermelon first.
- Dorito Snickers chocolate bar: Not for everyone, but the chilli, peanut and chocolate combination is surprisingly brilliant.
- S’mores wrap: Rich, sticky and wonderful as a once-in-a-while treat.
- Fire-roasted mozzarella sticks: Good fun with a smoky payoff, though not necessarily the most practical cooking method.
So there we are. The internet has once again delivered a mixture of clever kitchen ideas, gorgeous food, questionable food and things that need a rolling pin to become remotely manageable. But that garlic breadstick recipe? That one is staying.
Frequently Asked Questions
Can I make the garlic Parmesan breadsticks without an air fryer?
Yes. The breadsticks are designed for an air fryer, but the same garlic butter and Parmesan coating can be baked in an oven until golden and crisp. Keep an eye on them, as the exact cooking time will depend on the bread thickness and oven temperature.
Why did the yogurt fall off the watermelon?
Watermelon holds a lot of moisture, and that prevents yogurt from gripping the surface. Pat each wedge thoroughly dry with kitchen towel before coating it, then freeze the yogurt layer completely before adding chocolate.
What type of sprinkles should I use for a Fab-style watermelon lolly?
Use vermicelli sprinkles, which are the longer, thin colourful strands. They create the familiar Fab lolly look more accurately than hundreds and thousands.
Can I use other crisps in the Dorito chocolate bar?
You can, but the chilli Doritos provided the spicy kick that made this version work. Choose crisps with a strong flavour and keep a balance between sweet chocolate, salty crunch and any extra ingredients such as peanuts or peanut butter.
How do I stop the s’mores wrap from burning?
Cook it over gentle to medium heat rather than a fierce flame. Nutella and marshmallows contain plenty of sugar, so they can darken quickly. Toast each side slowly until the tortilla is golden and the filling is warm and gooey.
Are mozzarella sticks safe to cook over an open fire?
They can be, provided you use a secure metal skewer, keep rotating them and ensure they are cooked through. Handle the hot skewer carefully, keep clear of flames, and follow the heating guidance on the mozzarella stick packaging.